Setting up custom field swim-lanes
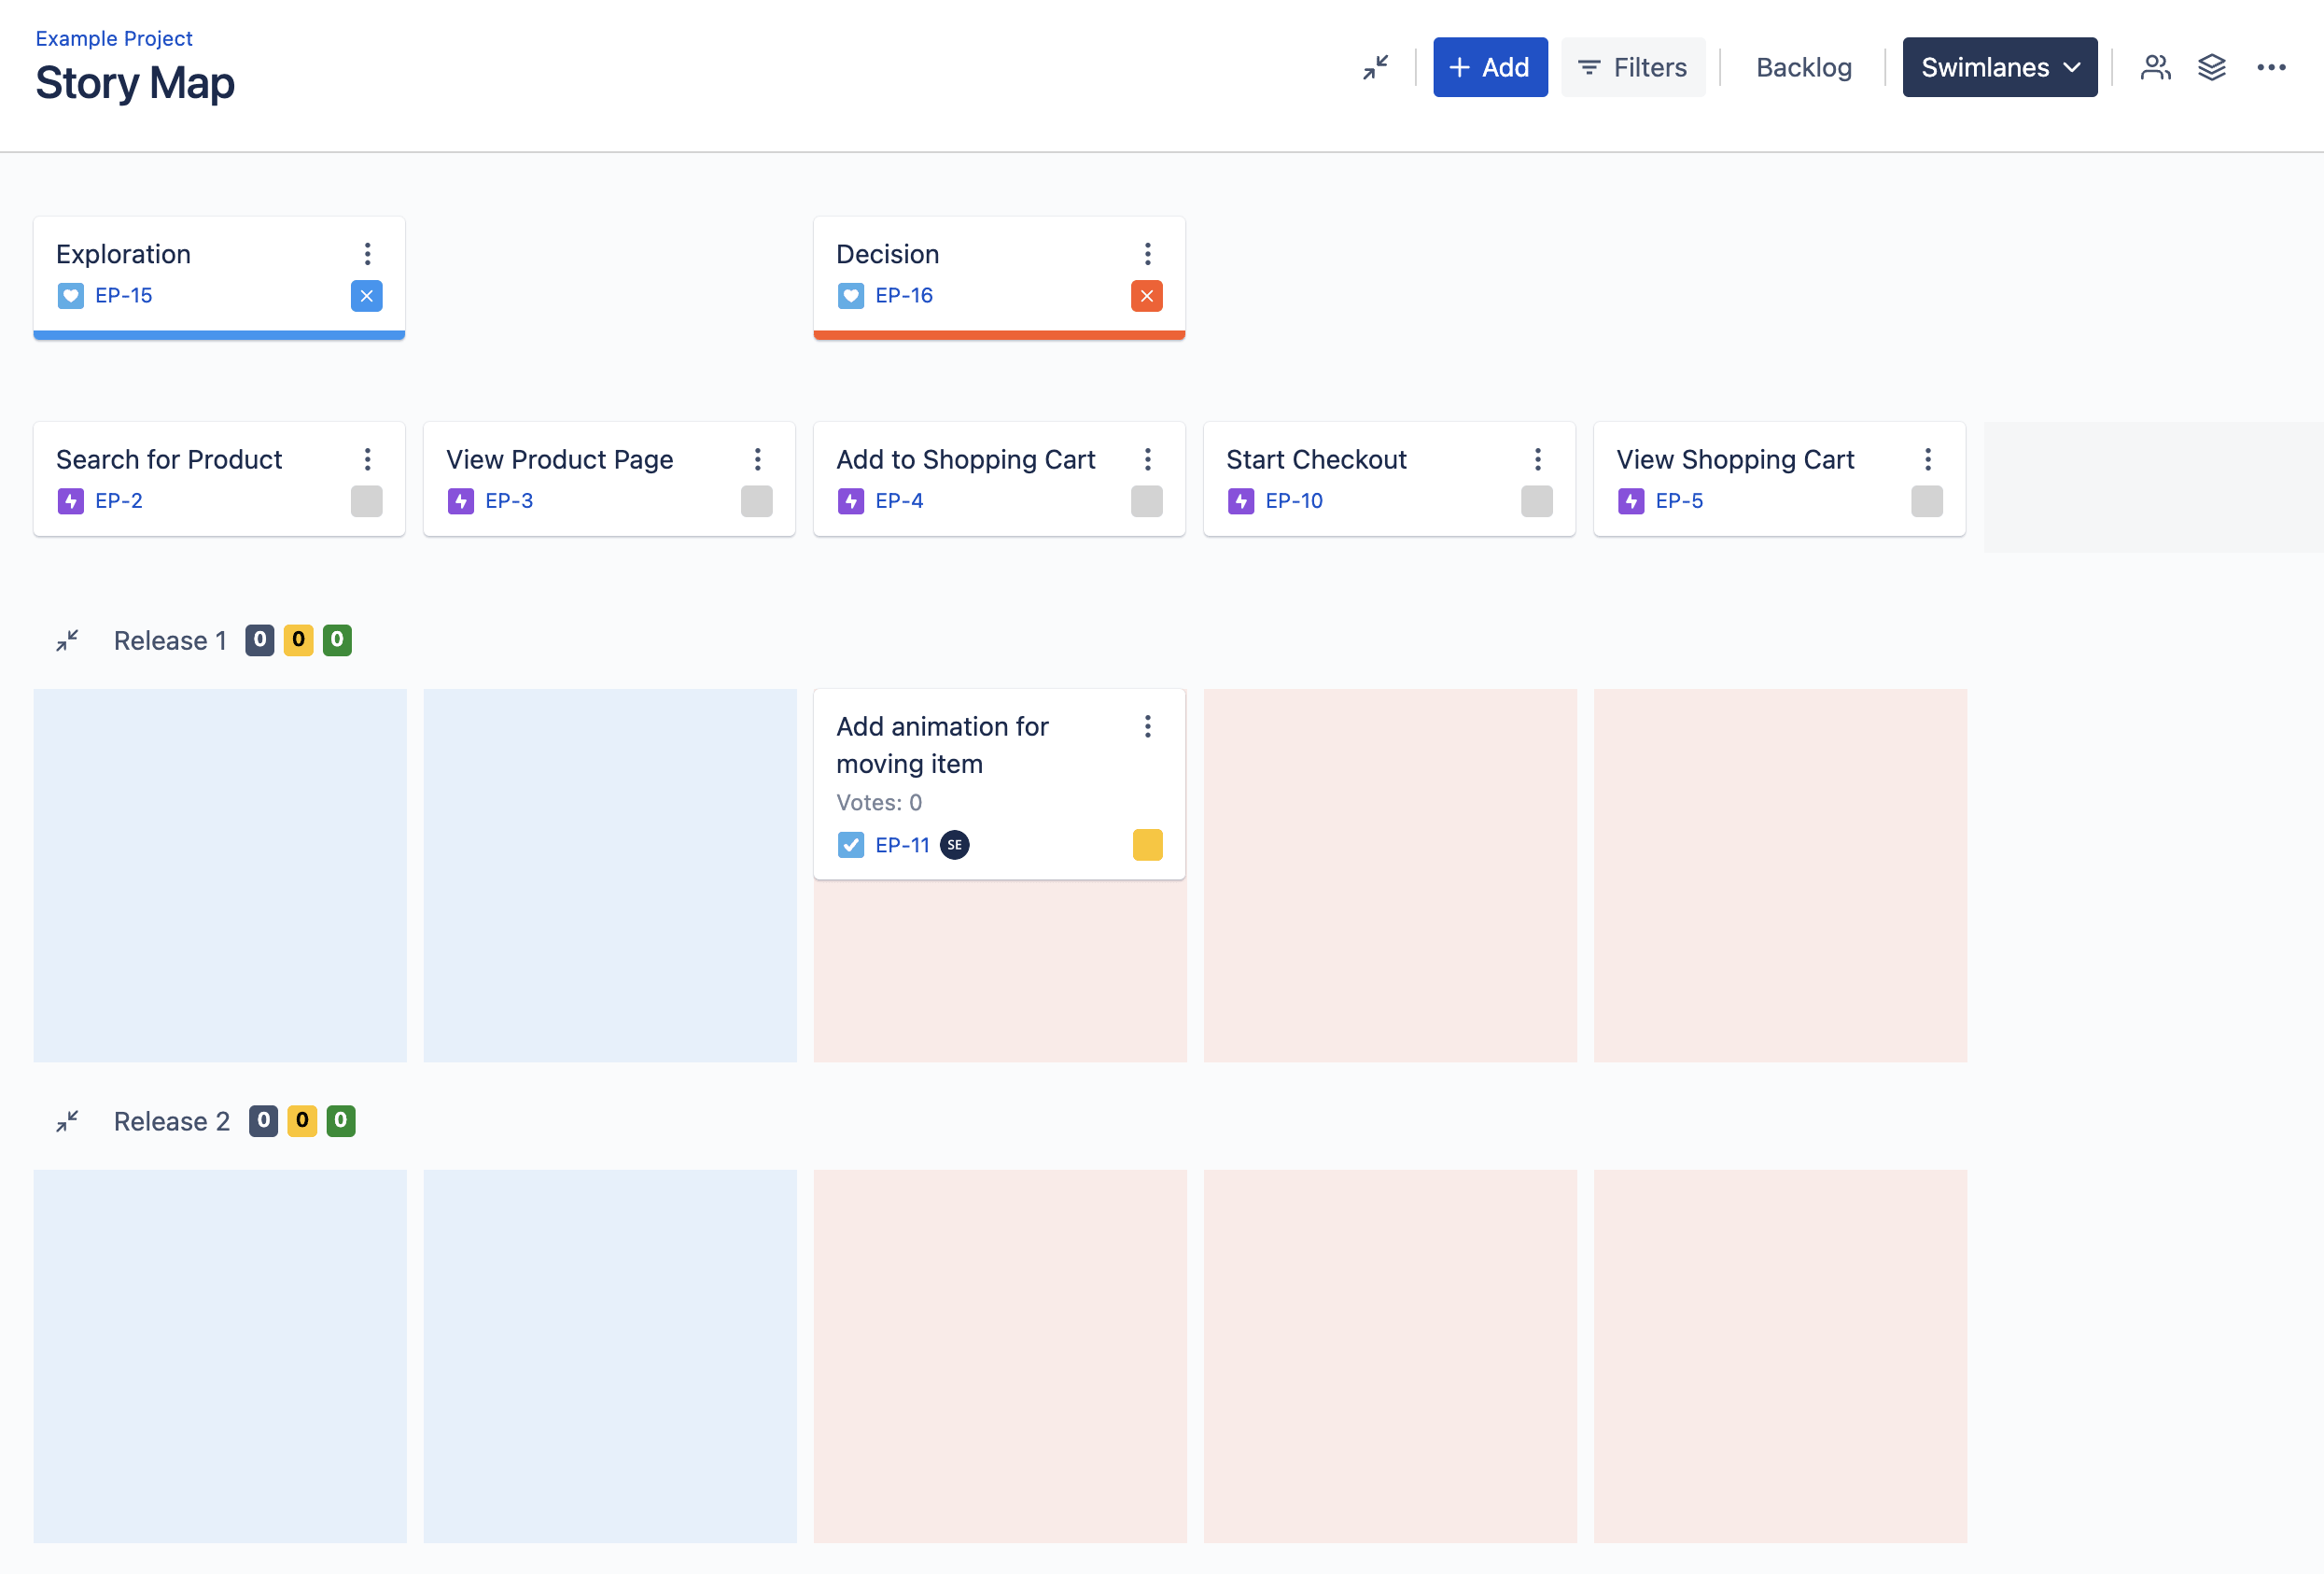
The user story map is a great tool for organizing and visualizing all of your team's user stories. However, you if you have releases or sprints across project set up in a custom field, it can get a bit complicated.
In this guide we'll go into detail on how to set up swim lanes in the user story map to show exactly what you want.
Creating the custom field
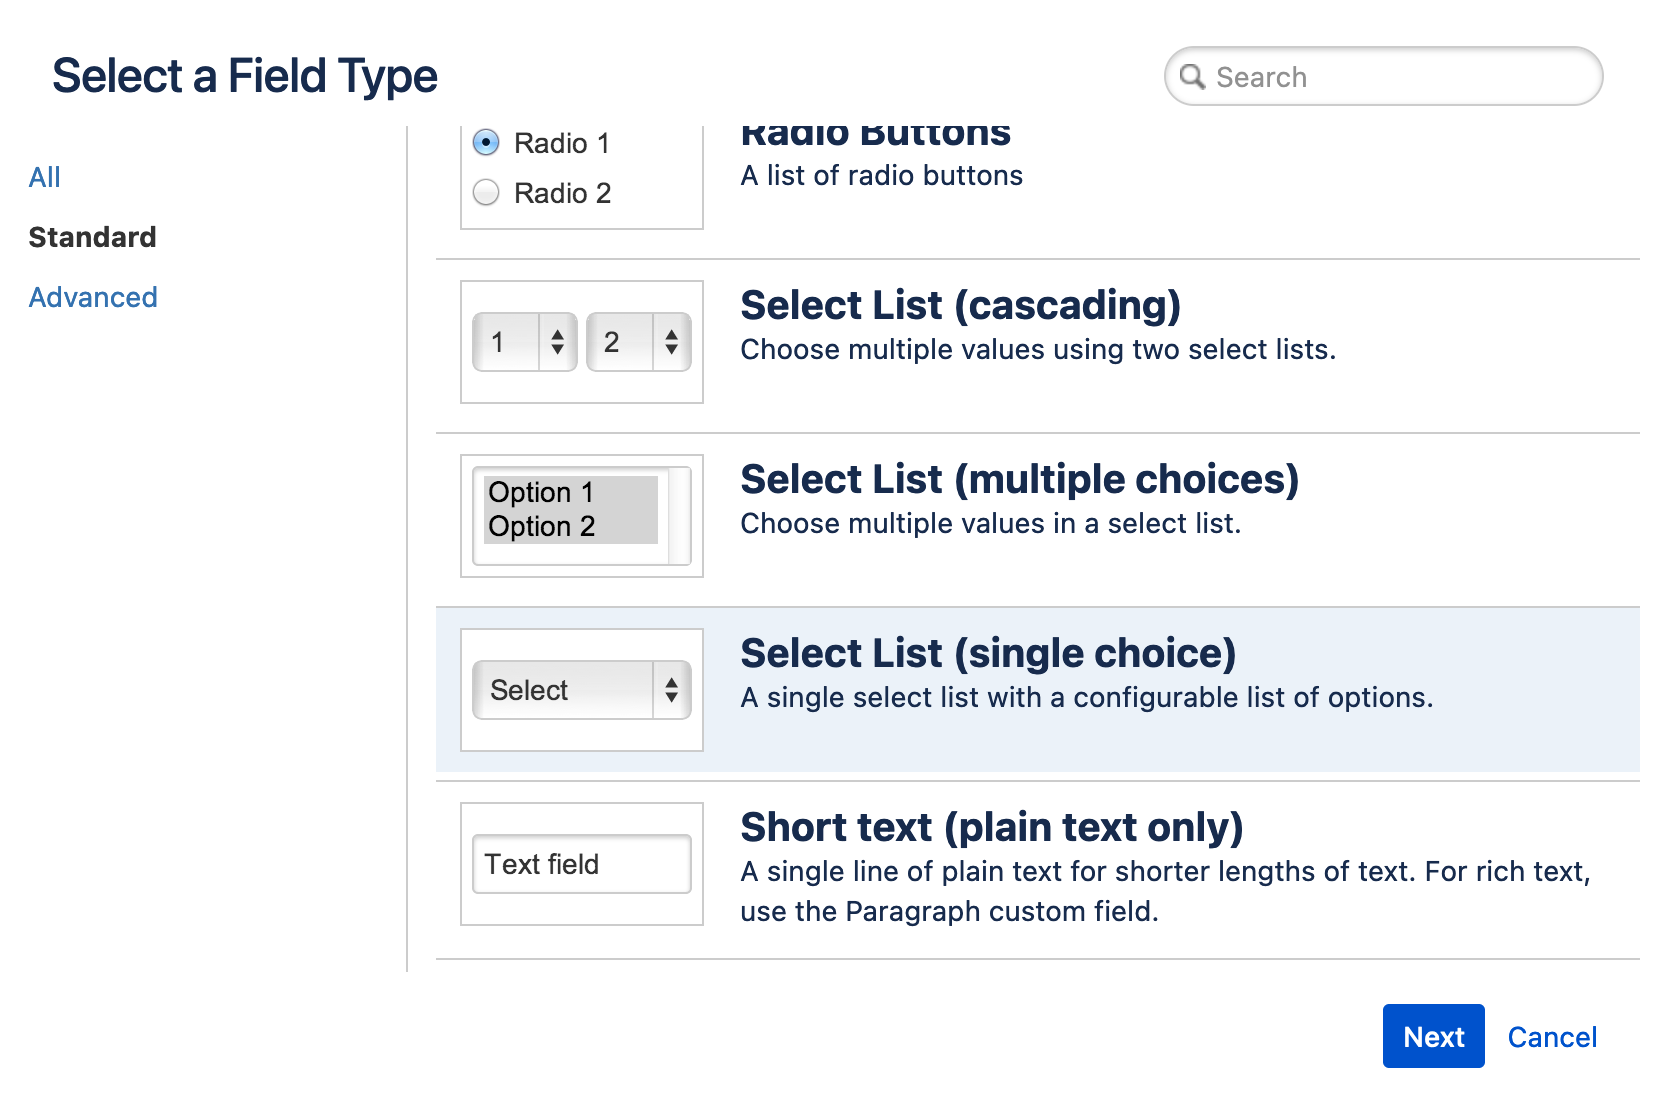
Go to your instance Jira administration and select Issues -> Custom Fields (this is the same for both Jira On-Premises and Cloud). Click create - you can now select from a variety of supported custom field types. We recommend "Single Select (single choice)" to work best with the story map but "Select List (multiple choices)", "Checkboxes" or "Radio Buttons" will also work (a note on working with multi-value fields: assigning multiple values via the story map will not work, but the app preserves existing custom field values if you drag issues between swim lanes).
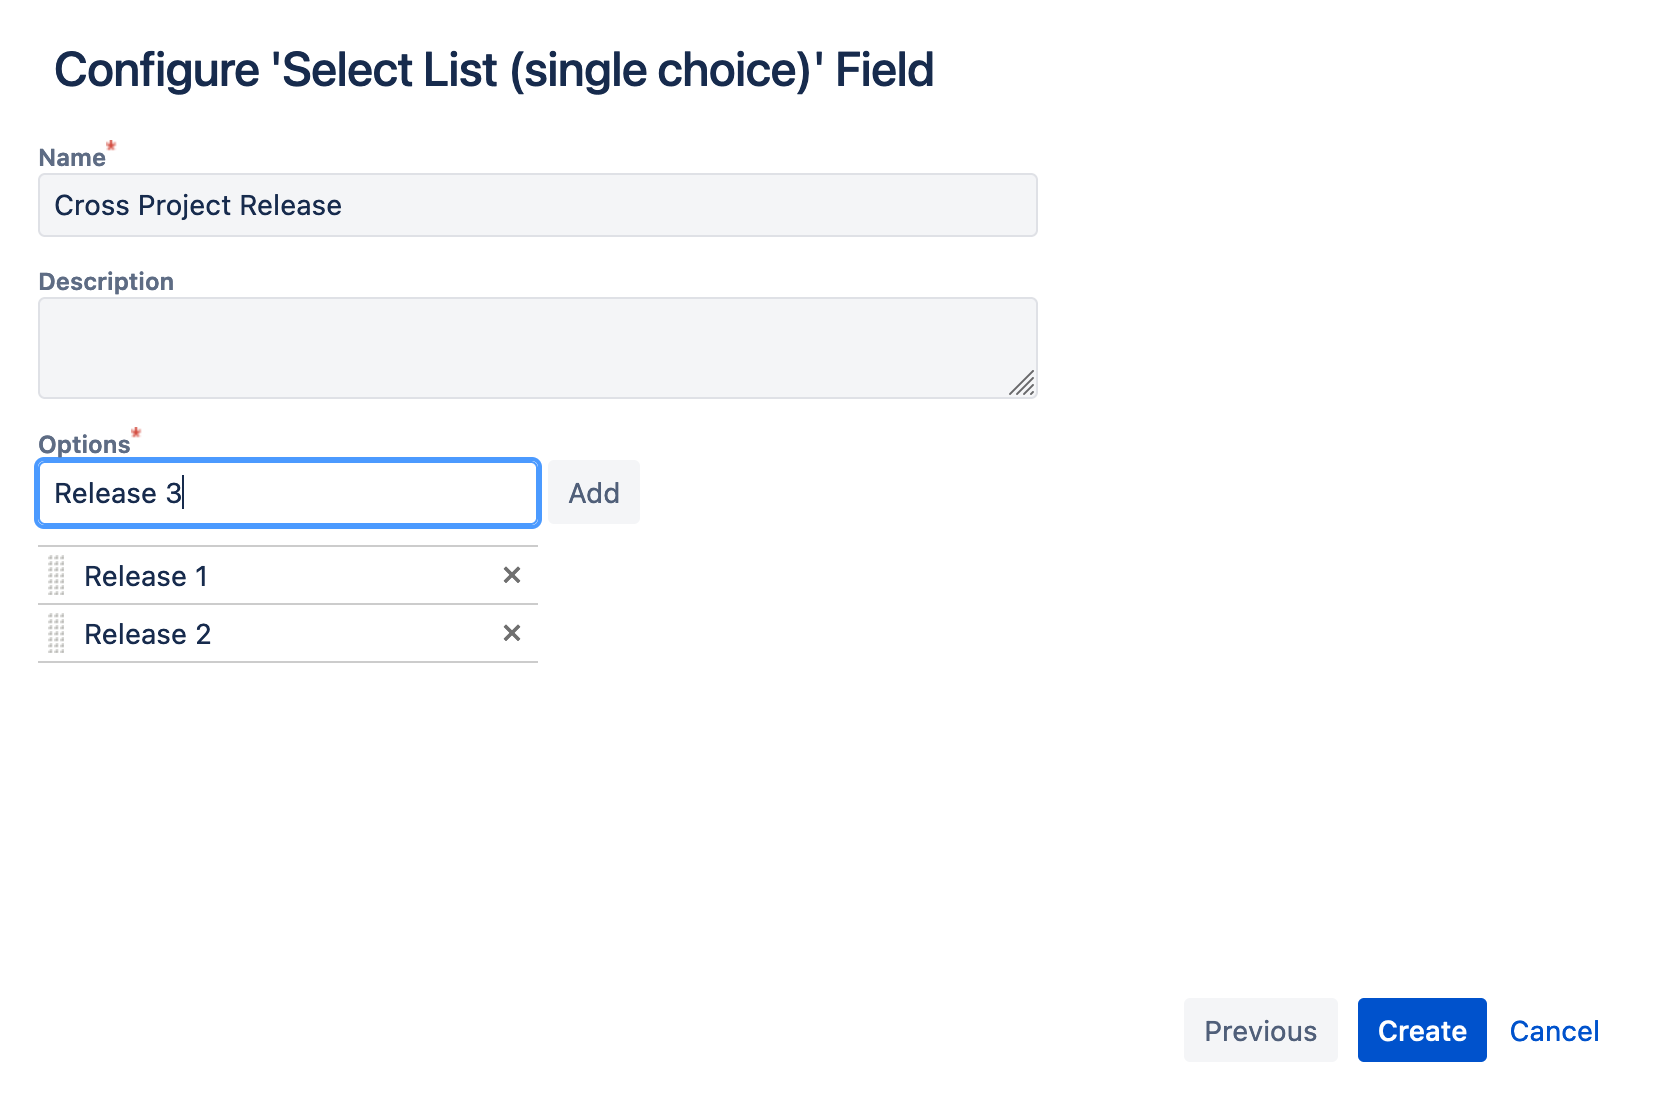
On the next screen, you will be able to add custom field values. You can modify these later if you go to the custom field administration and click on the menu next to the custom field and select "Contexts and default value".
The next step is really important in order for the app to retrieve the right values for your project: Add the custom field to the create screen of at least one issue of the project that hosts you story map. As an example: If you have a project with "Task", "Story" and "Epic", then add the custom field to the create screen of the "Story" or "Task" - ideally both. If the field is not on the create screen of any issue, then the app will not find the options you just entered. Also, if you try to create an issue from the story map within one of the swim lanes, the field needs to be on the create screen in order to be filled by the app.
If you are unsure in this step which screen to choose: Create the custom field, navigate to your project configuration, screens and manually add the field to one of the screens here.
Adding the custom field to the story map
The next steps are much easier. Open your user story map, in the top right-hand corner click More Options -> Settings and select "Swimlanes".
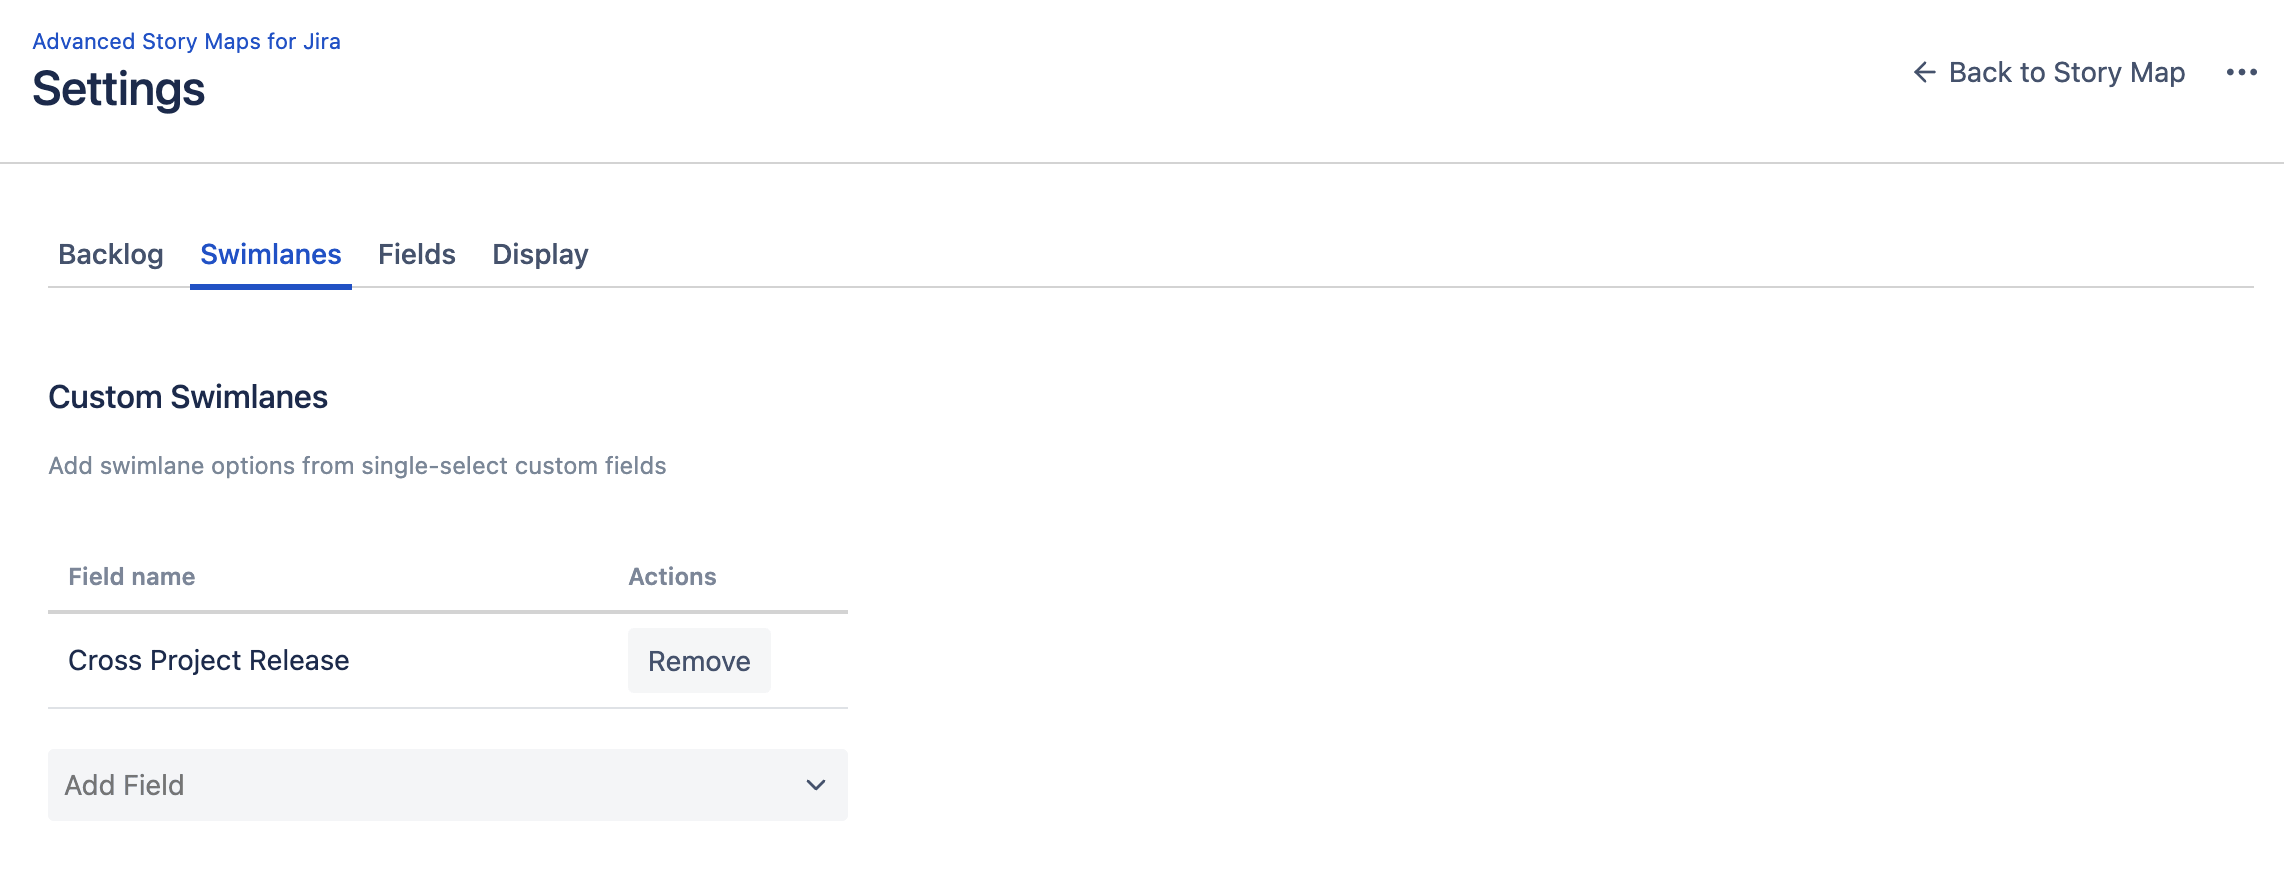
Now you can search for your custom field in the select field.
If you go back to the story map, switch the swim-lanes mode - the select list should display the name of your field now.
You can now assign issues via drag and drop to the custom field values.